Wiring a standard electrical outlet might seem like a simple weekend DIY project, especially when your laptop cord barely reaches that one unused wall. But it’s not a task to take lightly. Proper outlet wiring isn’t just about completing a circuit, it’s about protecting your home, your family, and your future safety. In this guide, we’ll walk you through each step with clear instructions, safety tips, and expert insight. You’ll learn what tools to use, how to avoid common mistakes, and when it’s time to call a pro (hint: you’re already thinking smart by doing your research).
Tools & Materials You’ll Need
Here’s what you’ll want close at hand before starting:
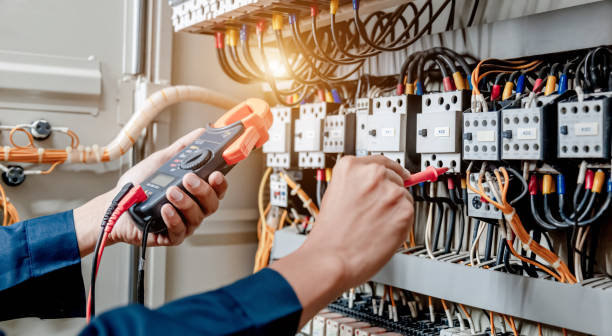
- Voltage tester or multimeter – to confirm the power is truly off
- Flathead and Phillips screwdrivers – for securing outlet screws and boxes
- Wire stripper – to cleanly strip insulation from wires
- Needle-nose pliers – for twisting copper wires with precision
- Replacement duplex outlet – 15 A or 20 A, matching your circuit
- Outlet box (if installing new) – ensure it matches your wall type
- Wire nuts – for safe connection of grounding wires
- Electrical tape – optional, for added insulation
- Outlet cover plate – to finish the job neatly
- Flashlight or work light – because lighting helps avoid mistakes
Having these prepped ahead of time means you’ll stay focused, safe, and organized while you work.
Turn Off the Power—Don’t Skip This Step
Before opening anything, head to your panel and switch off the breaker that controls that outlet’s circuit. Then plug in your voltage tester or multimeter to the existing receptacle (if present) or test the wires you’ve exposed, verify there’s absolutely no live voltage present. Never trust that the breaker you flipped is linked to the right circuit until you test it. Mistakes here can lead to shocks, or worse.
Remove the Old Outlet or Prep the New Box
- Remove the outlet cover with a flathead screwdriver.
- Unscrew both mounting screws holding the old outlet in place.
- Gently pull the outlet from the box without tugging on wires.
- Take note of how the wires are connected, this helps you replicate correct wiring later.
- If it’s a new installation, ensure the outlet box is securely mounted and the wires are at least ¾ inch protruding into the box.
Understand Your Wiring: Black, White, and Bare/Green
- Black (hot): Carries power to the outlet. It should connect to the brass-colored terminal on the outlet.
- White (neutral): Returns the current to the panel. It connects to the silver-colored terminal.
- Bare copper or green (ground): Directs stray current safely into the earth. This connects to the green grounding screw.
Never mix up these wires. Miswiring can cause dangerous electrical faults or immediate injury. If your wiring colors don’t match these (e.g., older knob-and-tube or ribbon cable), stop and consult a professional.
Connecting the Wires to the Outlet
- Strip about ½ inch of insulation off the black and white wires if needed.
- Bend each stripped wire end into a neat clockwise loop so it hugs the terminal screw. This helps ensure tight connections once screws are tightened.
- Connect the black (hot) wire to the brass terminal, tighten until snug.
- Connect the white (neutral) wire to the silver terminal.
- Twist your bare copper grounding wires together, secure with a wire nut, then attach to the green grounding screw, or under the grounding screw on the outlet if only one ground wire.
- Optionally wrap a bit of electrical tape around the outlet’s terminals to add an extra layer of insulation.
Secure the Outlet and Test Your Work
- Tuck the wires neatly back into the box, don’t pinch or crimp them.
- Screw the outlet securely into the box so that it sits flush with the wall.
- Reattach the cover plate.
- Turn the breaker back on.
- Use your voltage tester or plug in a lamp to confirm the outlet works only where it should (e.g., not on other circuits).
- If there’s a nearby GFCI outlet or circuit, test the reset functionality. If anything sparks, trips, or feels wrong, immediately shut off power and review your connections, or call in support.
When It’s Time to Call a Licensed Electrician
DIY wiring has its limits. It’s time to call a Tulsa-based professional like Watt’s Right Electric if you encounter:
- Confusing or damaged wiring (e.g., frayed, non-color‑coded, or knob‑and‑tube wiring)
- Weak or flickering power after installation
- New circuits needed or upgrading to heavier-duty outlets like 20 amp or USB-combination receptacles
- Permits or inspections required in your area
- Any concern for safety or code compliance, when in doubt, don’t risk it
Our team brings licensed expertise, fair flat-rate pricing, financing support, and 24/7 emergency availability. Plus, we’re Tulsa-owned and proudly serve residential communities with a personal touch, no franchise, just neighbors helping neighbors.
Safe Wiring Means Peace of Mind—Here’s Why It Matters
Properly wired outlets do more than power your gadgets, they protect against shock, fire hazards, and appliance damage. Grounded, well-connected outlets safeguard plugged-in electronics and provide reliable long-term performance. Miswired or loose outlets can cause arcing, overheating, and dangerous failures. When in doubt, it’s not just electrical code that matters, it’s the safety and reassurance of every family member under your roof.
What’s Next for Your Outlet Project?
Now you’ve got the knowledge, and a little confidence, to safely DIY a standard outlet installation. But always remember: when things don’t look or feel right, calling a trusted local electrician isn’t admitting defeat, it’s choosing safety and expertise. Whatever your next step, may your home stay powered, protected, and peaceful.